
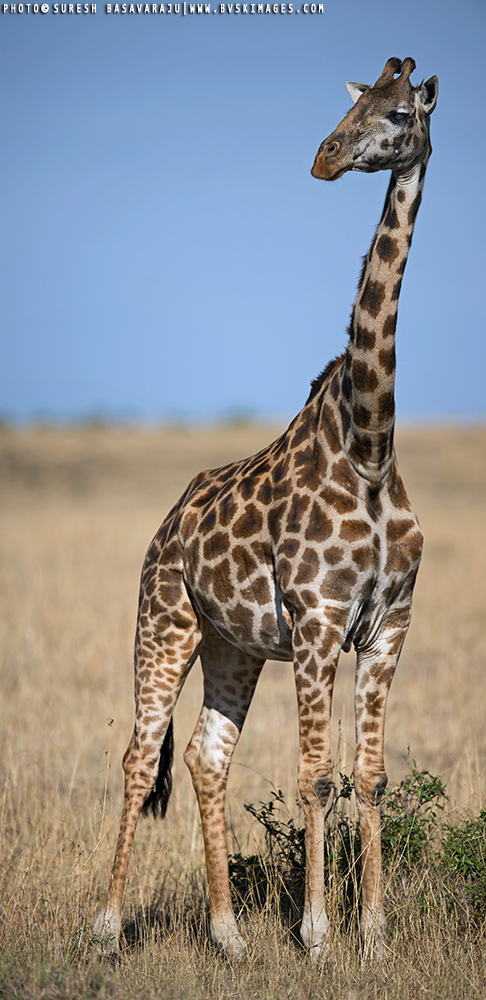
- Masai Giraffe, Maasai Mara, Kenya.
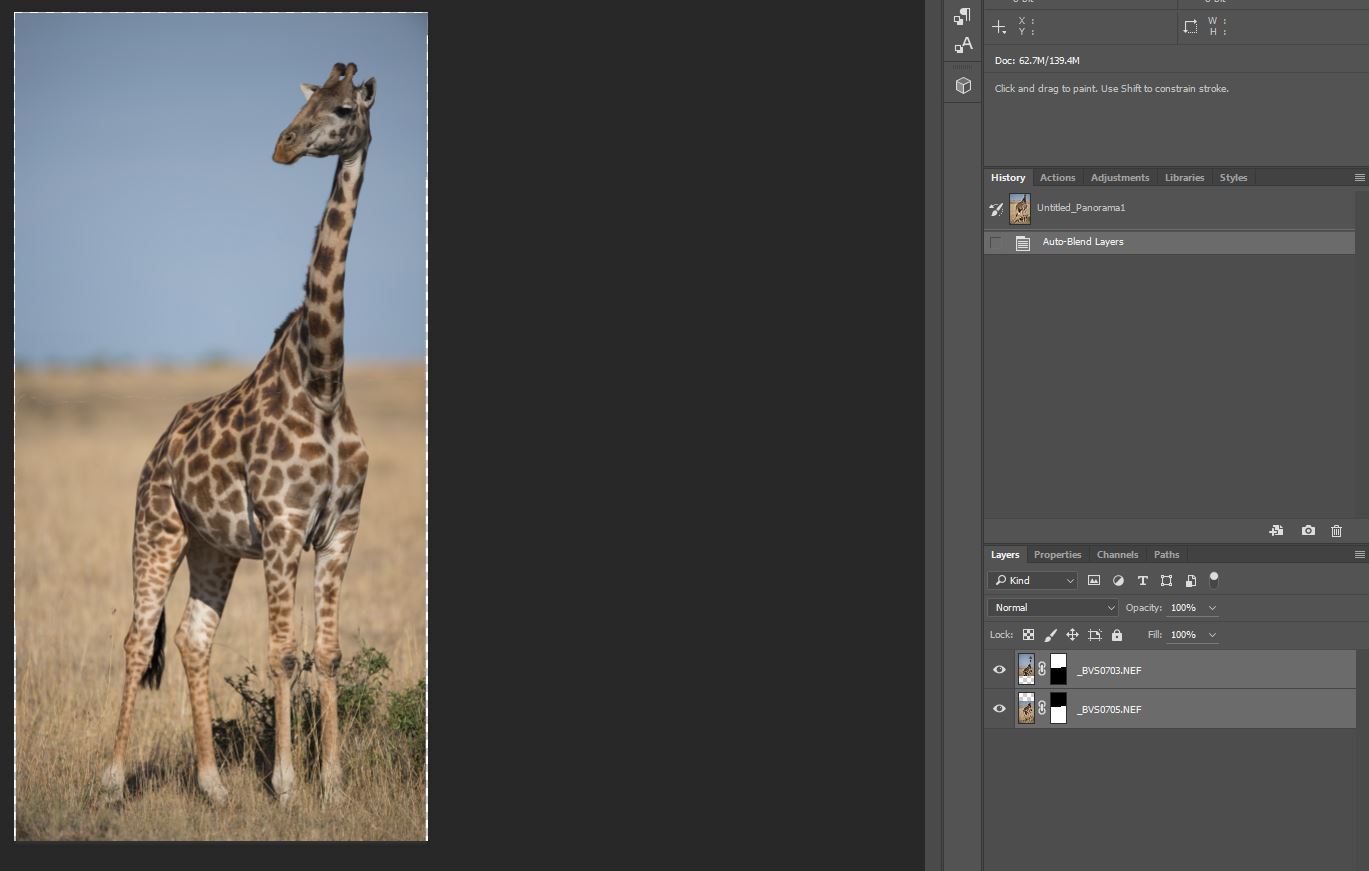
1 + 1 = 1
Something about the equation doesn't seem right?
We’ll come to that in a moment! First, Wishing you all a happy new year and may the light shine on your images and wishing you have the health, wealth, and the time to visit new places in this new year and create wonderful images that grants you satisfaction and shows the world your perspective of the travel.
This is how it goes. Africa can never stop surprising you. You get animals from a small size to the largest, tallest, heaviest you have ever seen. The sheer variety and the opportunities makes many a photographer carry their entire arsenal of lenses on the trip. Some even rent out equipment for the trip. Just to have the view and the means to capture these animals in the viewfinder. Also, having different lenses lets you create different perspectives.
I will usually pack a Nikon 17-35mm f/2.8, Nikon 70-200mm f/2.8, and a Nikon 500mm f/4 or the 600mm f/4. This range is suitable for me to create wide perspectives, close-ups and frame filling shots. At least for one trip I want to travel with just two lenses to challenge myself to create images with the least equipment. That would be a 50mm and a 600mm. A fellow traveller had once packed a 14-24, 24-70, 200-400mm, 800mm with 3 camera bodies. While this covers the wide range, One needs to transport these to the field, carry them on the vehicle, keep all the batteries charged, and when the scene presents itself, the thought process turns towards which lens to use rather than how to capture the scene. This worked for him and works for many other photographers but I like the one lens challenge where with a single lens, I challenge myself to create an image out of the scene in front of me.
If there is one lens do it all then I would say the 200-400mm f/4 would be a good lens to have for Africa. Of course it depends on what type of photographer you are and what your plans are.
In my trip to Masaai Mara in Oct 2015, I came across a Giraffe at close distance. Now I had taken images of this species in 17-35mm and a 70-200mm in a wide variety of situations in my first trip in 2014. Giraffe in a landscape, Giraffe in a typical neck fight, Giraffe in backlight and so on. Now I wanted a frame filling close-up. I took an image in the 70-200mm and while I could cover the entire animal in the frame with this lens, the problem was that the view also captured quite a bit of the surroundings which in this frame were not working out. I wanted a close crop and took a frame with the 600mm and with the view of the 600mm I could not get the entire animal in the frame. The legs were getting chopped of. The view, of course was not as I wanted.
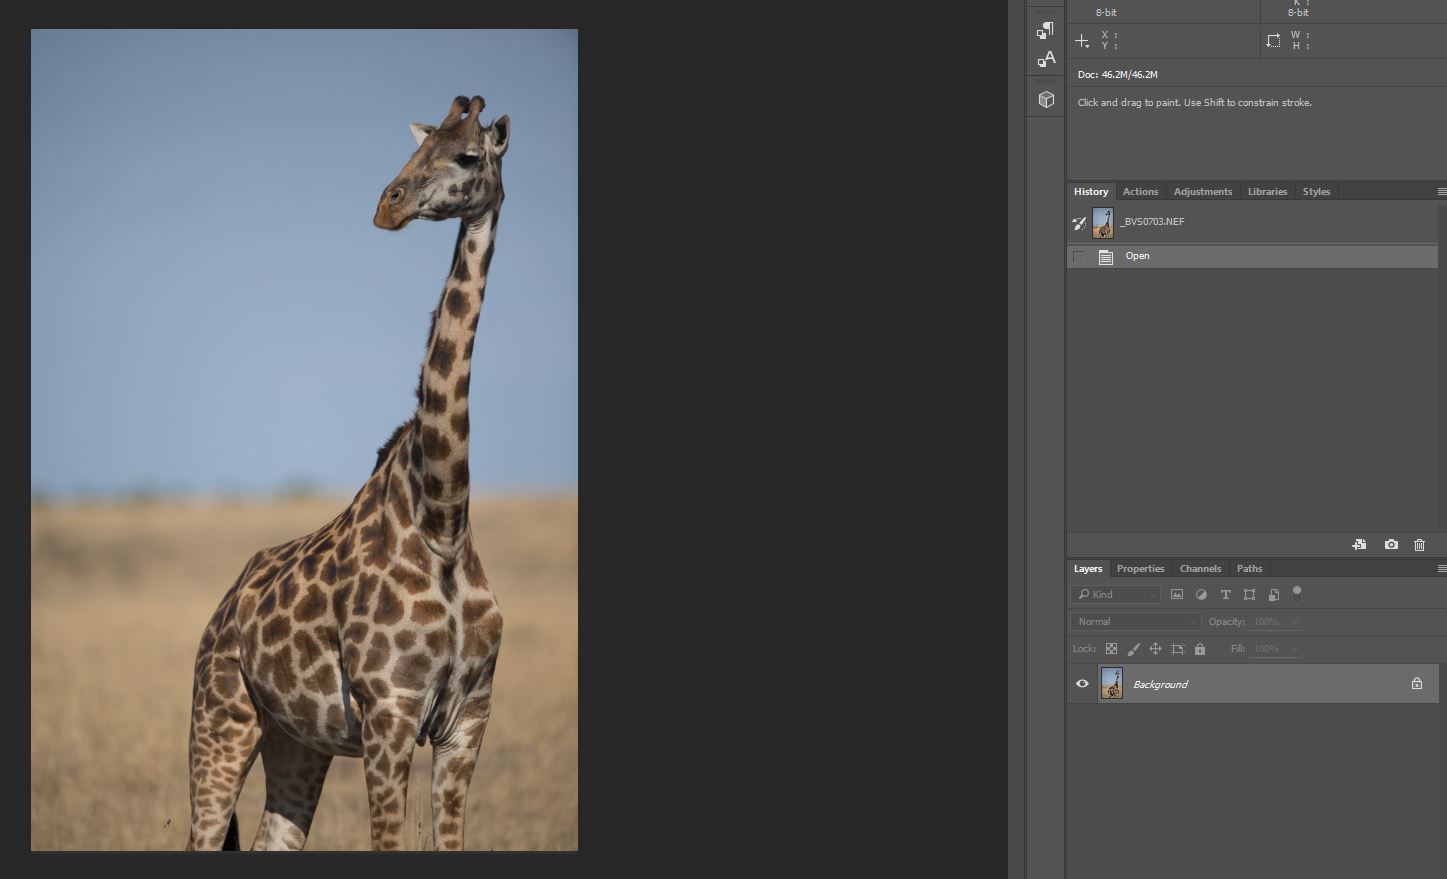
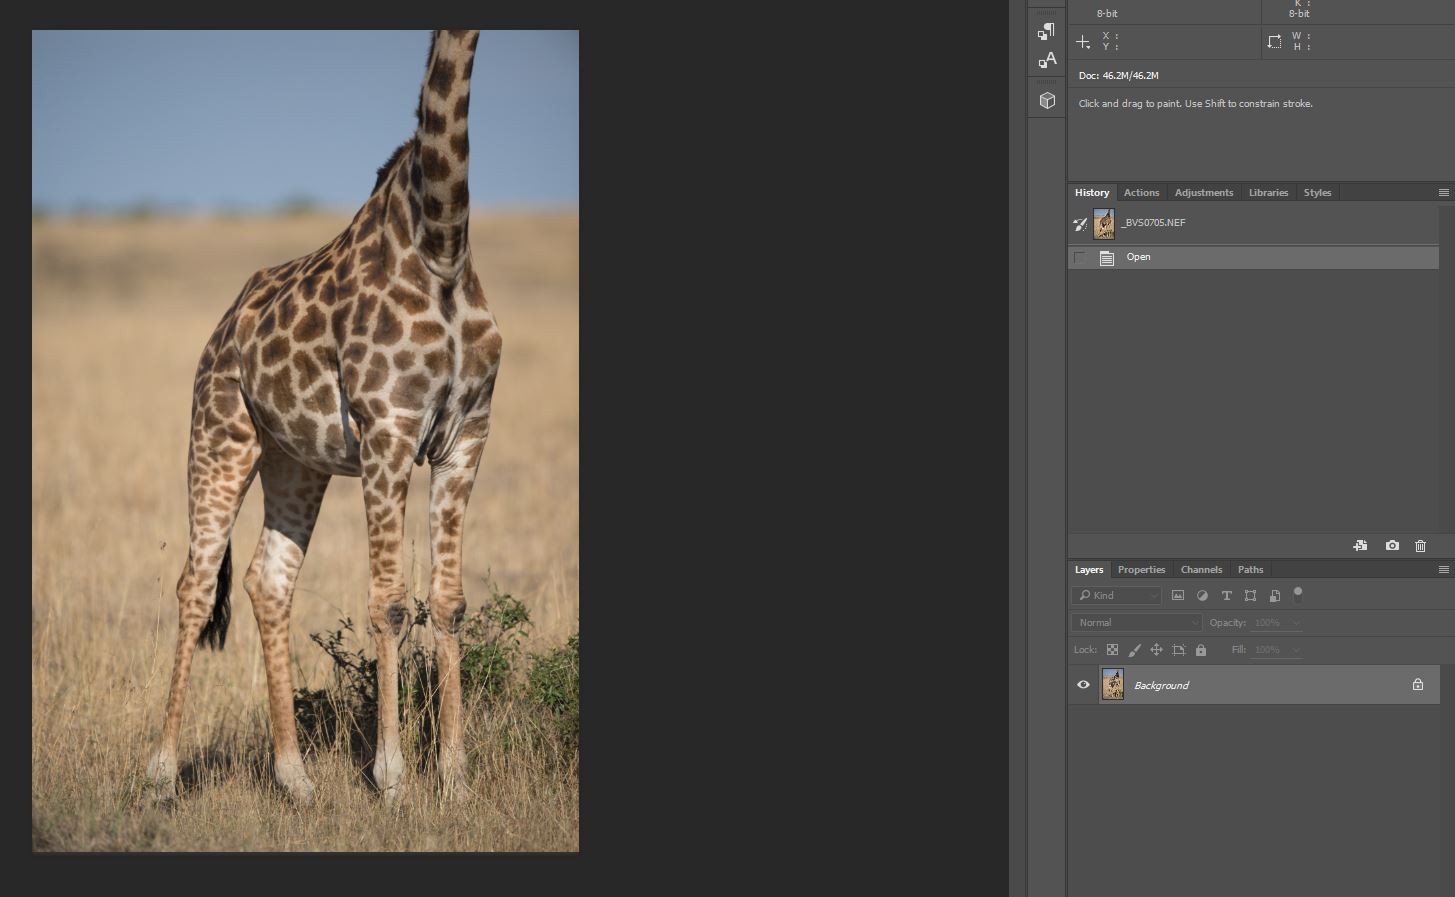
So I resorted to what I do in this situations most of the time, i.e. take multiple shots of the scene, one covering the head to the torso and carefully aligning from torso to the legs in the next frame. Now I have two images of the scene that need to be combined later in post processing to get the entire picture. That is where 1 + 1 = 1.
I have done this with leopards and tigers in India when they were too close for me to get the entire animal in the frame. I have taken a vast herd of wildebeest in Africa in about 8 frames, Elephants in Corbett India with about 16 frames. Landscape photographers have done this for ages when a single frame does not do justice to the scene. We even had cinemas in 70mm which was of course using the area of two 36mm x 24mm frames together to create a wide view.
How does one go about doing this? First when you come across a scene that needs to be stitched later. Switch to manual exposure metering, that way the scene will be rendered in same exposure instead of the auto modes where you might end up with two frames with two different exposures.
Most important to note is that you need to ensure that there are overlapping areas for the software to recognise the points to merge. Otherwise it will not be able to create a composite.
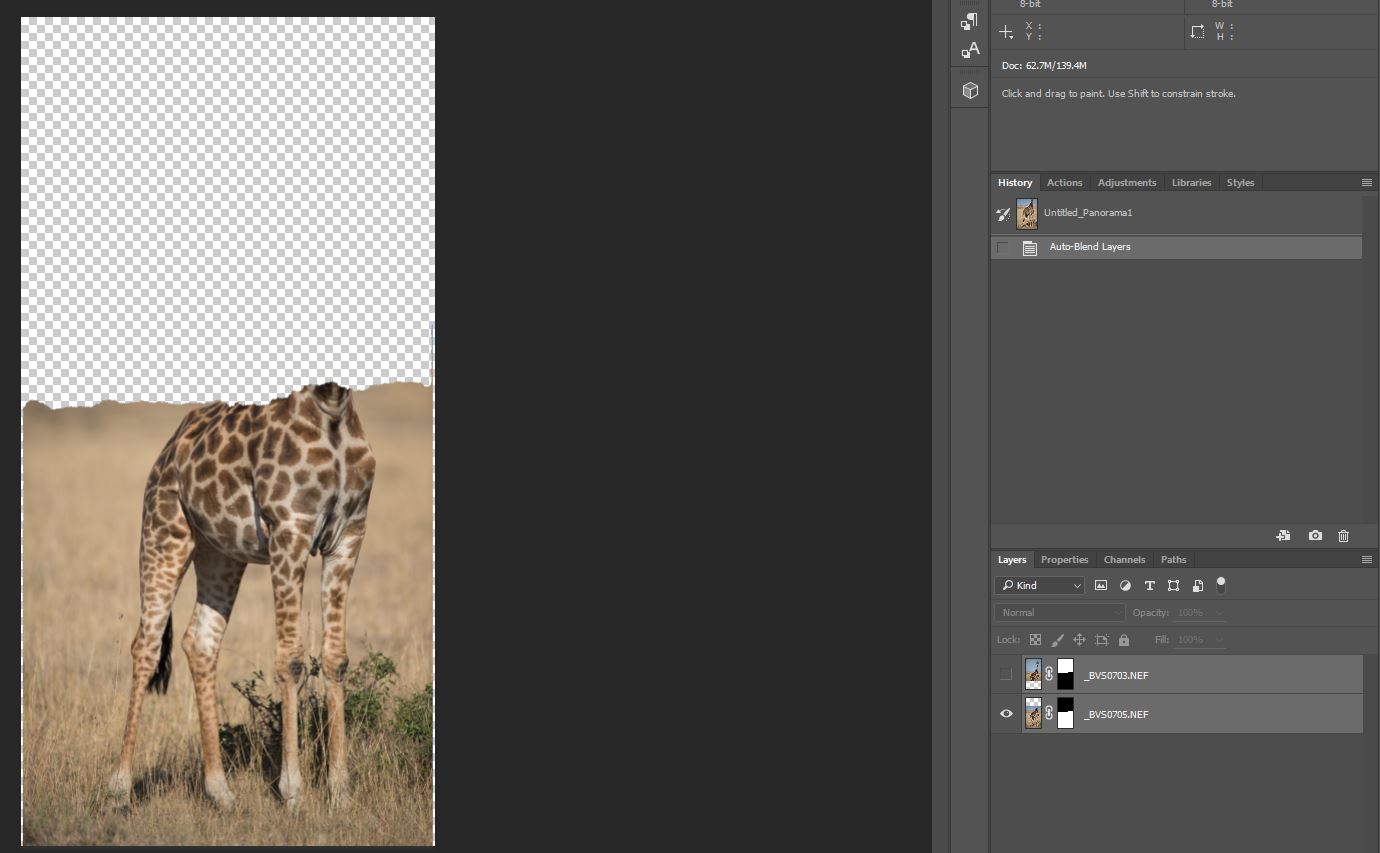
Also, capture enough areas around the subject so that when stiching is done, you don't end up with the white & grey checkboxes which indicate the areas with no image when the layers are merged.
The subject needs to be still of course. So hurry up an take multiple frames before the subject decides to turn.
For horizontal subject placements, take four frames, left top, right top, left bottom, right bottom, so the merging happens seamlessly. In this case, two frames were enough and notice the slight white & grey checkboxes towards the edge of the frame.
Import the frames into Photoshop and after your basic corrections, use File->Automate->Photomerge. Follow the prompts and create the image you wanted.
I have included screen shots of the two images from Photoshop so you can have an idea about how the two images ended up as one.

Limitation at times is not in the lens, it is in the photographer. More of the journey in the following week. Happy Clicking!